Appku

Appku - Software Landing WordPress Theme

Thank you for purchasing our Theme. We hope that you find all your questions regarding this Theme answered in this Documentation as much in details as possible. However, if you still need support, do not hesitate to contact us at our support forum for this Theme. If you have any questions that are beyond the scope of this help file, please feel free to email me. Thanks so much!

Intro

Appku is a Responsive quick and easy customizable Minimal Software Landing WordPress Theme that comes with 2 home pages and more than 12+ pages variations the appku theme is an amazing startup and service launch landing page which is extremely easy to use. Besides its unique and modern look, all subscription and contact forms are fully functional, secure. Moreover, Minfox is designed for all devices, not only responsive, It is fully optimized for all display devices. You can use for WordPress App, Software Startup, App Showcase, App Marketing, Mobile App, Android or IOS App, digital agency, and more website projects… or your just a Blog. Well commented code, well-documented file structure and 24/7 professional and ultra-fast Support.

  • Multipage Theme
  • Sharp and Clean Design
  • Fully Responsive Design
  • Componanat Base Section
  • Blog Pages Included
  • Contact Form 7 Integrated
  • Mailchimp Builtin
  • 25+ Custom Elementor Addons for Appku
  • Theme Option Support
  • Customizer Support
  • WPML Support
  • Free Font Icons (Font Awesome, Flaticon)
  • All Necessary Pages

Instalation

Once you've downloaded the installation file on ThemeForest, extract it and locate a file called appku.zip. You can install the theme by using one of two installation methods:

  • WordPress upload - This is probably the simplest way for most users. Here are the steps you need to take:
    1. Login to WordPress admin
    2. Go to admin panel > Appearance > Themes > Add New > Upload Theme
    3. Click on "Choose File" and select appku.zip
    4. Click on "Install Now"
    5. When your theme is successfully installed, click Activate to activate the newly installed theme.
  • FTP upload - If you wish to install via FTP, here are the steps you need to take:
    1. Using FTP client, login to the server where your WordPress website is hosted
    2. Using FTP client, navigate to the /wp-content/themes/ directory under your WordPress website's root directory
    3. Using FTP client, upload the appku directory to themes directory on remote server
    4. Once uploaded, navigate to Dashboard > Appearance > Themes in the WordPress Dashboard and hit Activate below your newly uploaded theme.
When you use first or second method, please make sure that you're uploading the appku.zip file, not entire package you downloaded. If you upload the wrong file you will get an error stating “Error: missing style.css stylesheet.” (static website).

Once installation is complete, your appku theme will be ready to use. You should now see appku theme as active .

Great - you can now start building your site!

Common Error during Installation.

The error: "Maximum Execution Time Exceeded in WordPress"

If you are installing your theme from the WordPress theme installer, but get a message that says "Maximum Execution Time Exceeded in WordPress", most likely your web server is configured with PHP settings that are too low to allow the theme ZIP file to upload. Specifically, PHP is configured to a maximum file upload size limit at 8 megabytes or less. The theme ZIP is about 10 megabytes in size. Thus, the web server is rejecting the upload. WordPress is giving you a rather ambiguous message in response. This is not a theme fault or bug. There two ways to solve this problem:.

Instructions about memory limit increase. you can increase the maximum upload size in WordPress. Edit the .htaccess file in your WordPress site’s root folder and add the following code:

                            
    php_value max_execution_time 500
    php_value memory_limit 64M
    php_value post_max_size 4M
    php_value max_input_time 500
    php_value upload_max_filesize 10M


Plugin Installtion

After theme instalation you need to install and activate included plugins.

One Click Demo Import

Before Demo Import Please make sure that successfully activated all required plugins in your theme.
  1. To import our demo content, please see the step bleow:
    • Log in to that site as an administrator.
    • Go to Appearence -> Import Demo Data
    • Click Import Demo Data
Thumb
It will take some time for importing the demo contents.After importing demo data, please update your permalink. To update permalink, navigate to Settings -> Permalink and then click on Save Settings button.
Thumb Thumb

Appku Theme added some features which is added bellow :

Setup The Static Front Page

    • Go to Pages > Add New and create a page.
    • Go to the Settings > Reading and set Home page displays to A static page.
    • Select the page you created in step one as the Front page, and, if you plan to have a blog as well, choose another page as the Posts page to display your blog posts.
Thumb

Mailchimp Settings

    • From Admin menu, navigate to Appku Options. Then go to Subscribed tab.
    • Set Your Won Mailchimp API Key
    • Set Your Won Mailchimp List ID
    • Click Save Changes
Thumb

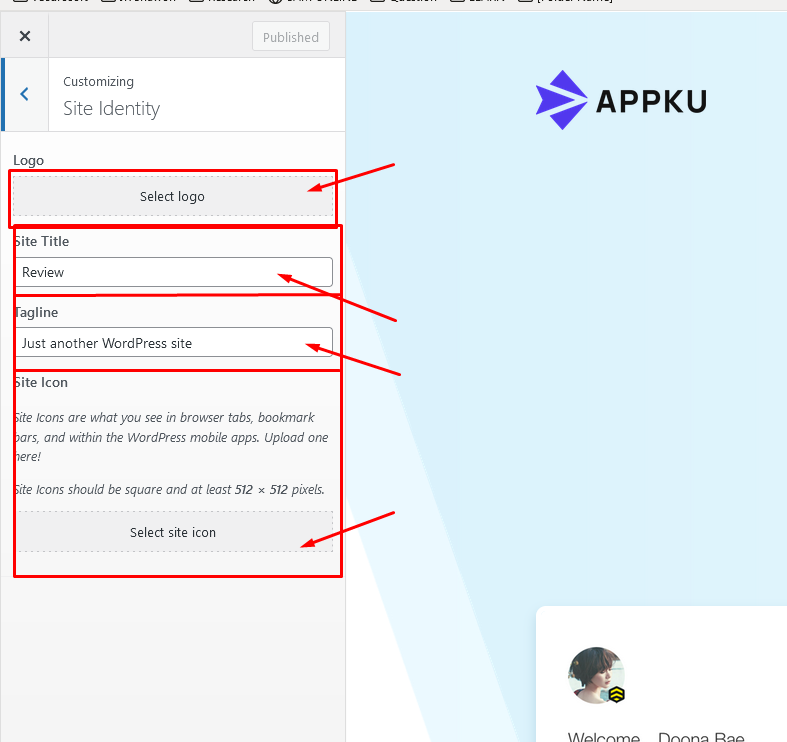
Site Identity

First Step
Thumb
Secound Step
Thumb
    • After changing the settings, Click on Publish button

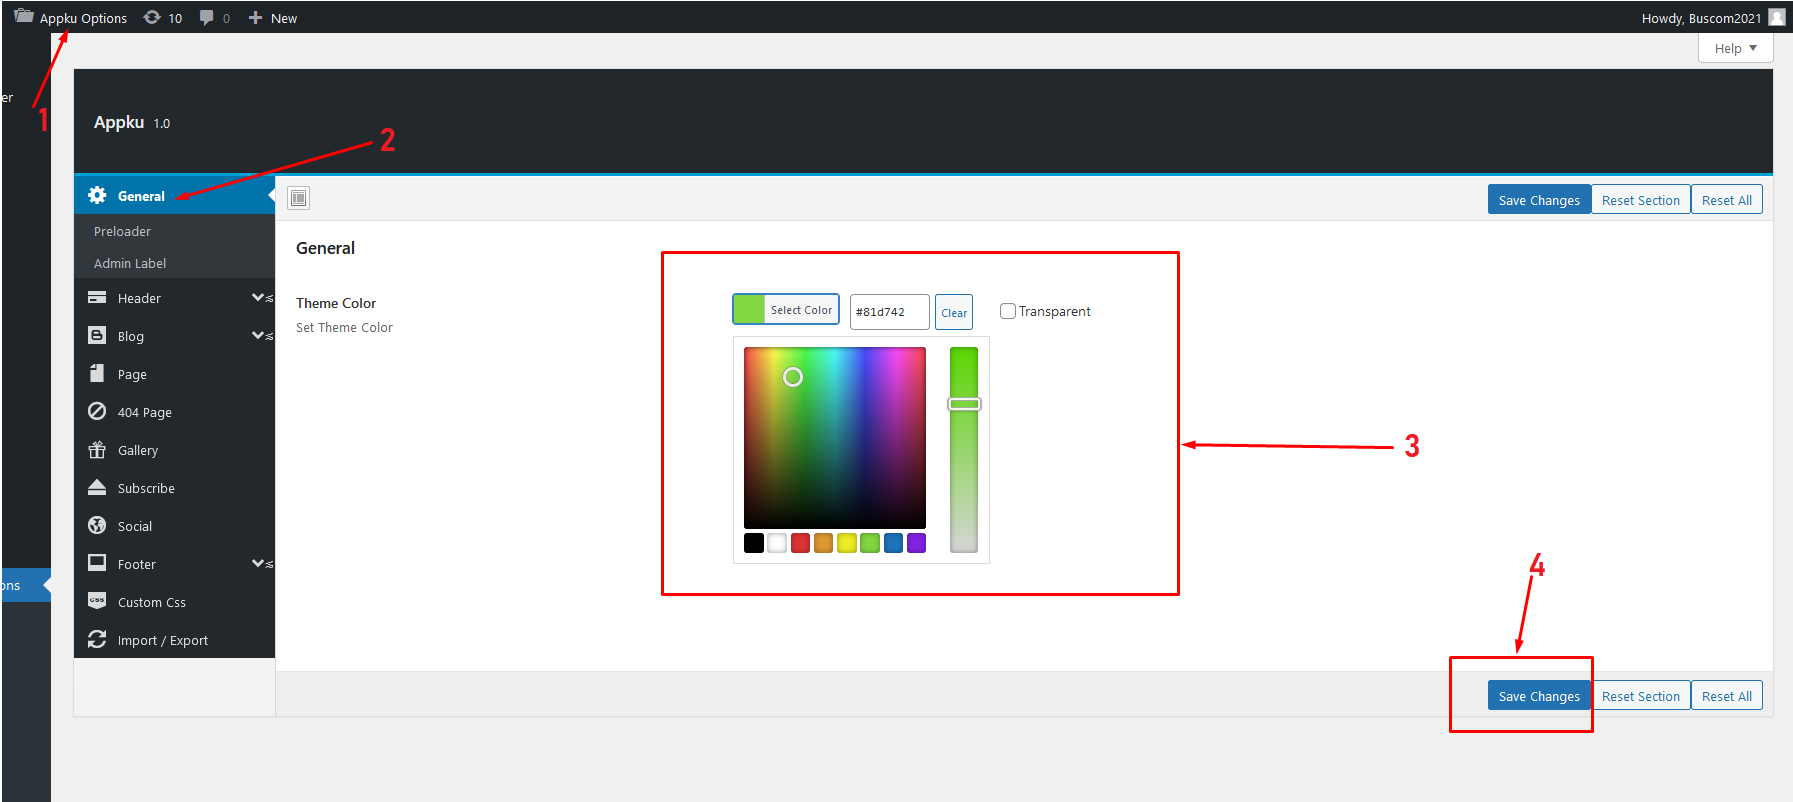
Theme color changes by one click

    • 1. go to appku option
    • 2. click on general tab
    • 3. After change the color click on save changes button
Thumb

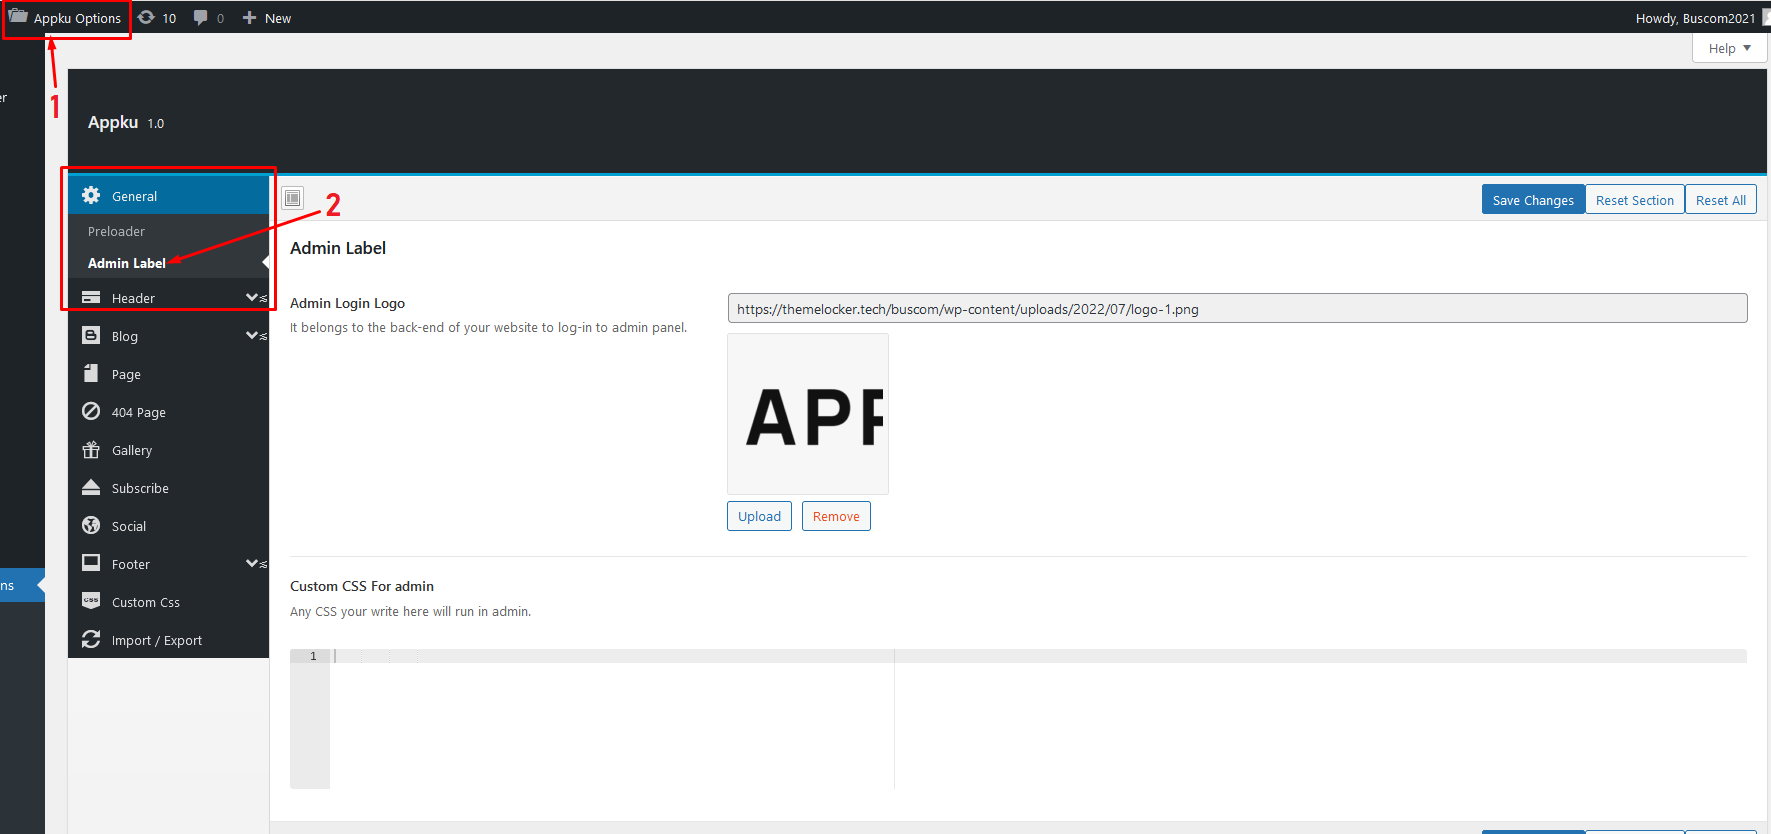
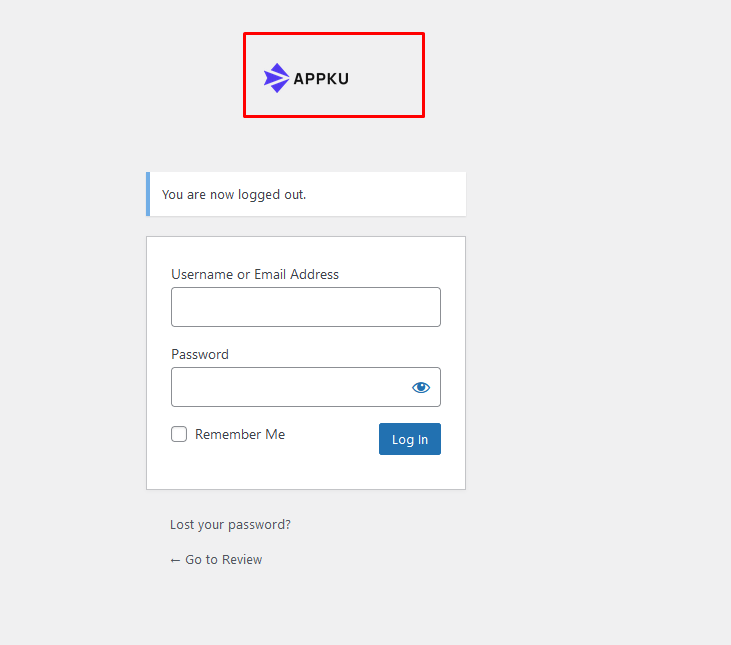
Option for change the admin logo

    • 1. go to appku option
    • 2. click on admin label tab under the general tab
    • 3. After change the image click on save changes button
Thumb the output will show here Thumb
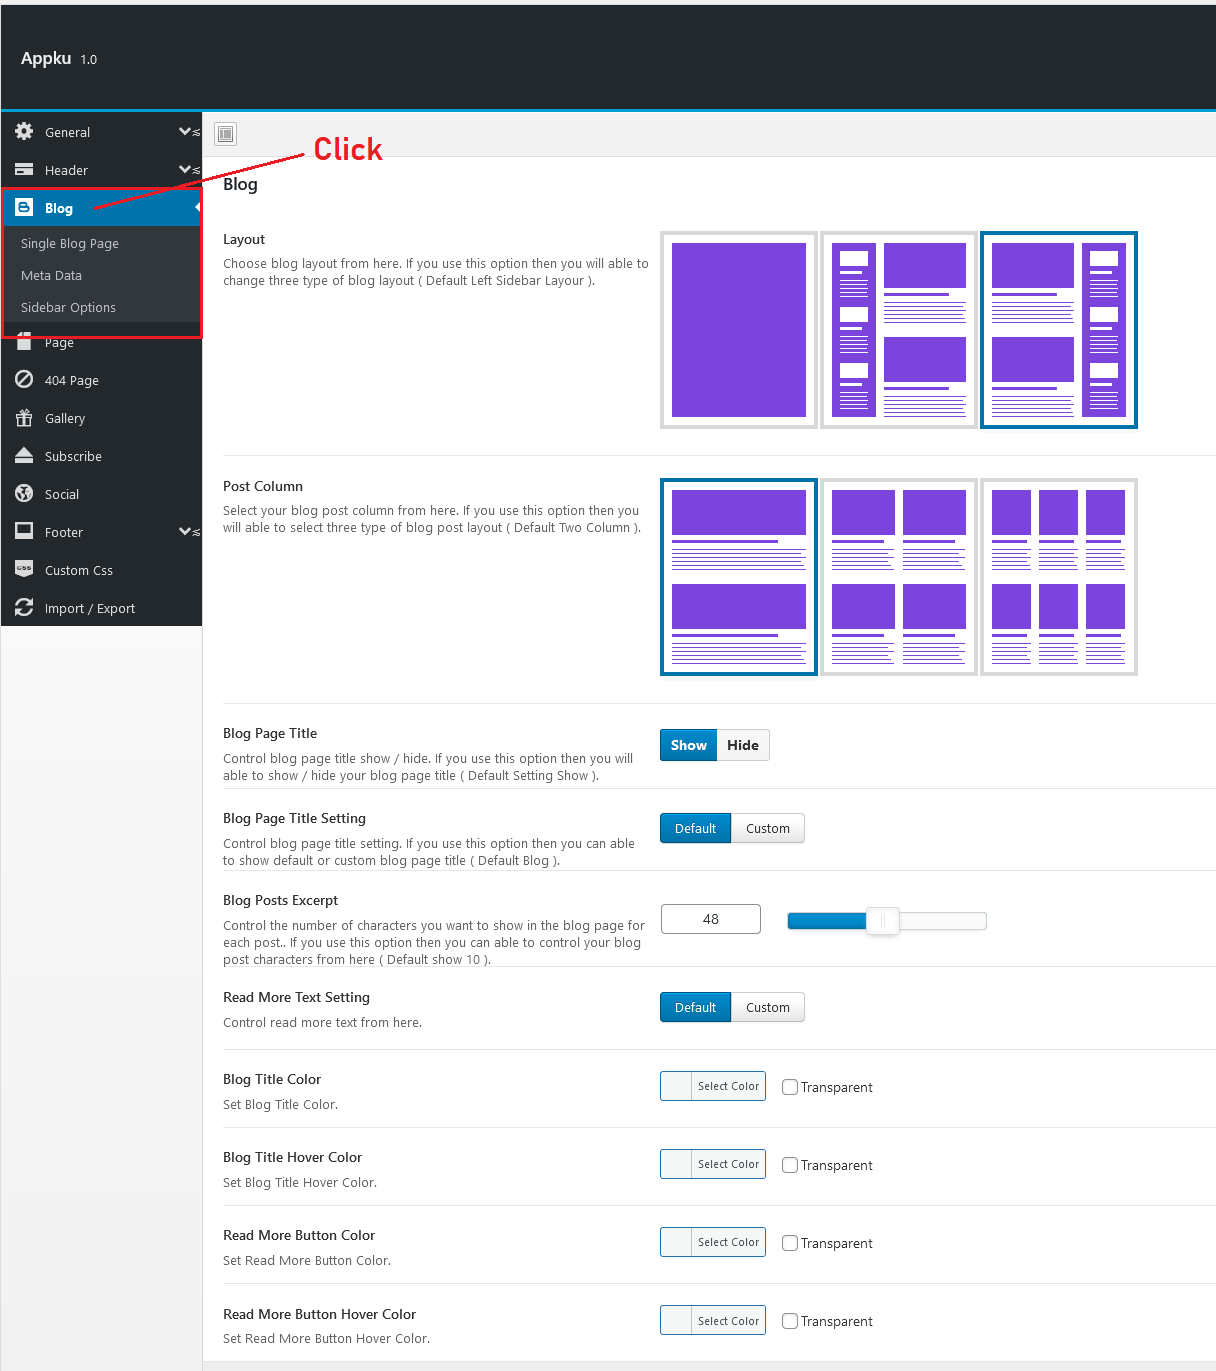
The Appku theme has a lot of option for control the blog

    • the theme have a lot of contol for the blog page, you may configure it as your requirment.
Thumb

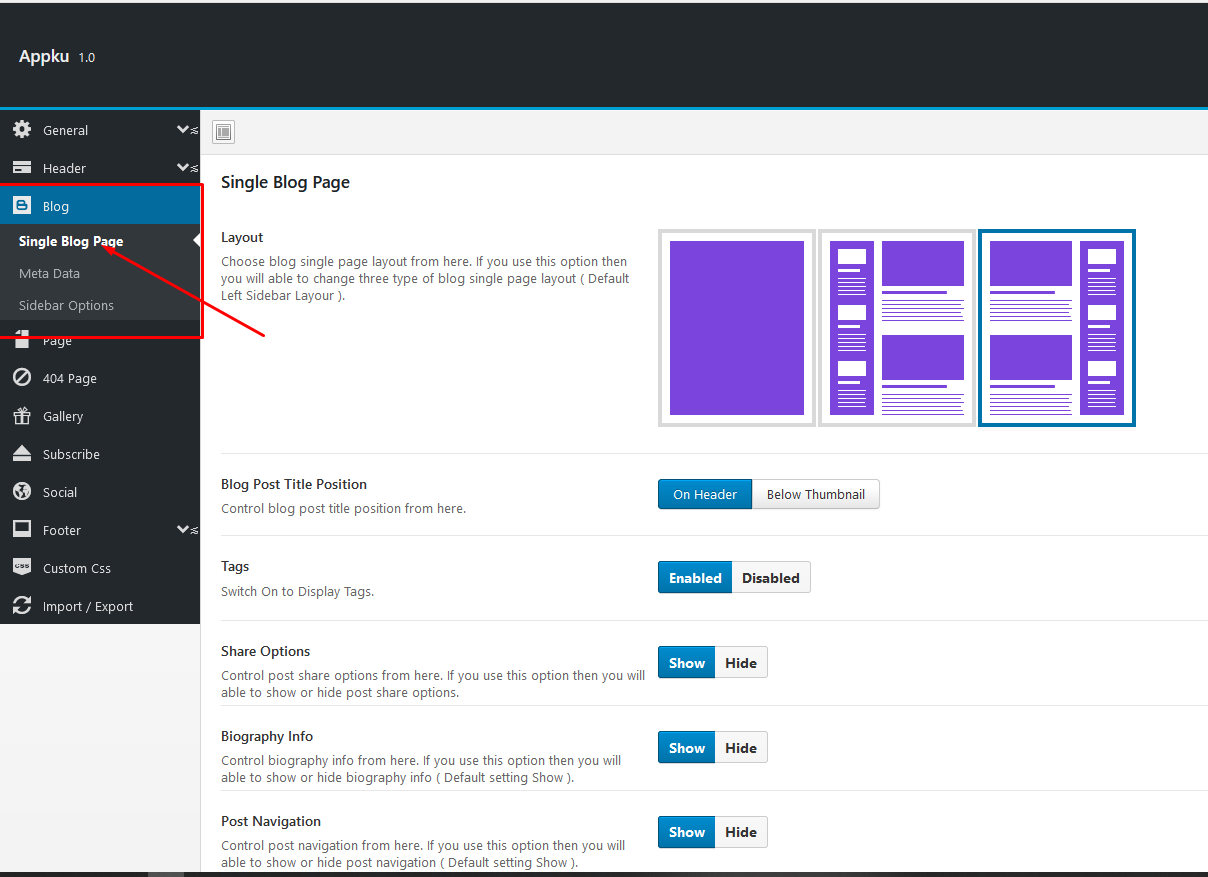
Blog single page settings

    • the theme have a lot of contol for the blog single page, you may configure it as your requirment.
Thumb

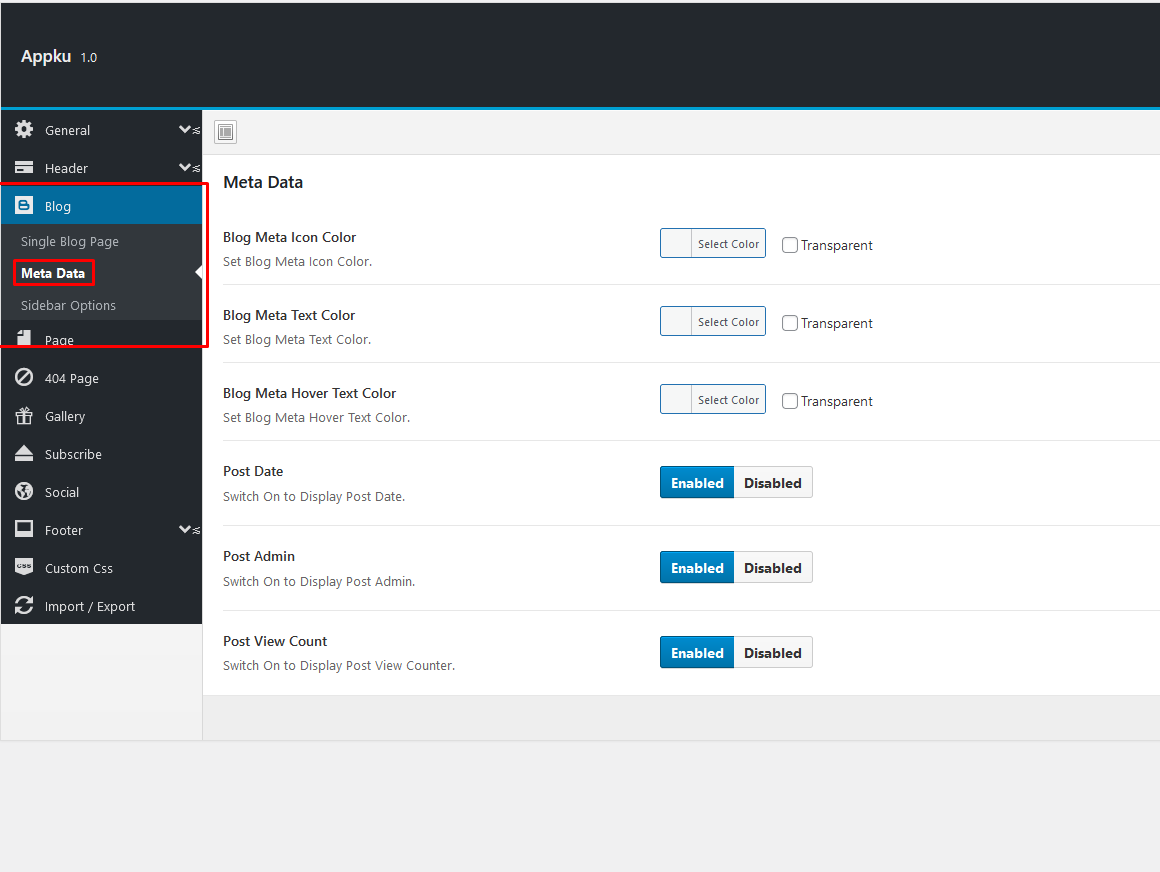
Blog meta options

    • the control section is for blog meta admin icon, date icon, view counter iconyou may configure it as your requirment.
Thumb

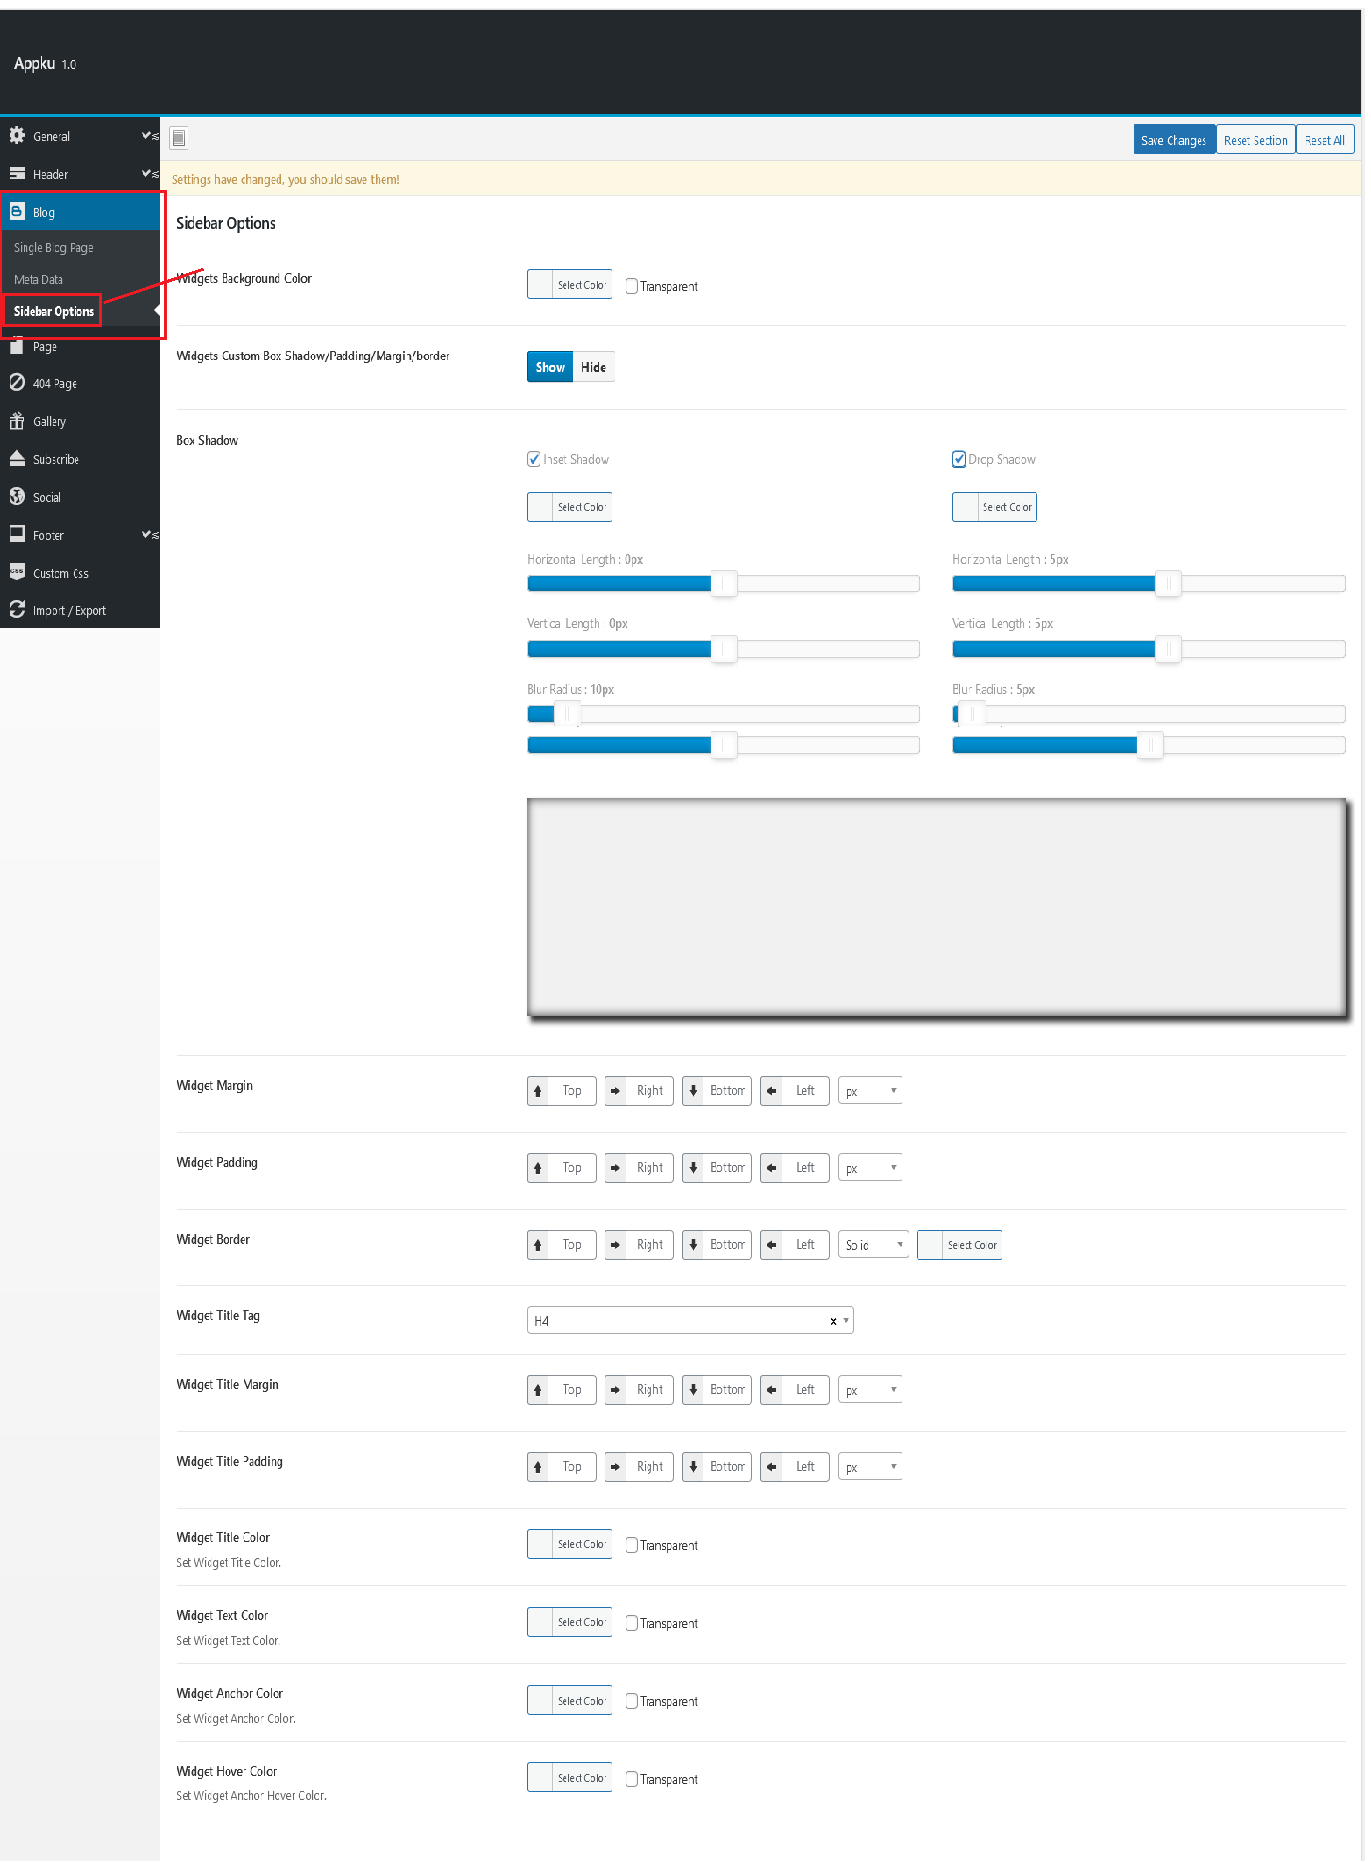
Blog sidebar options

Thumb

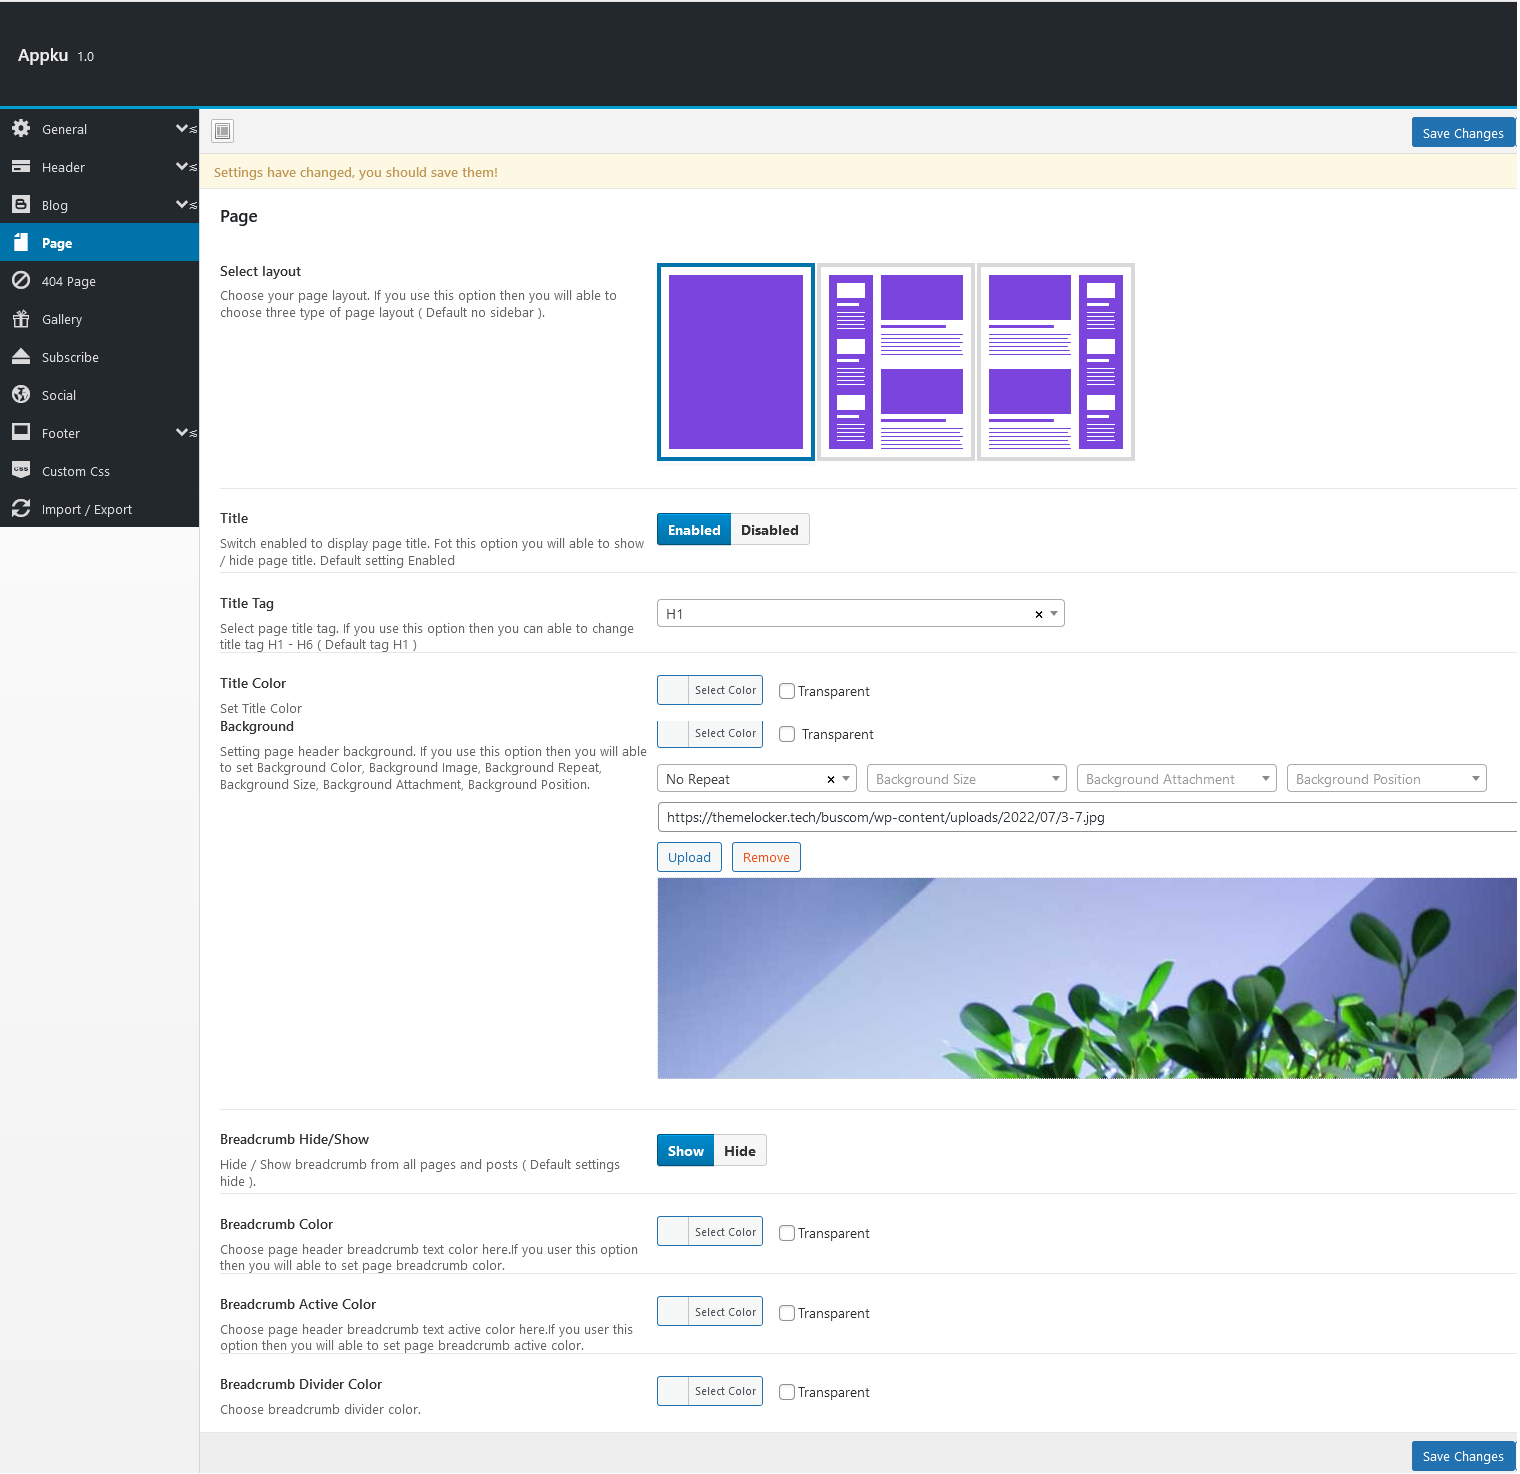
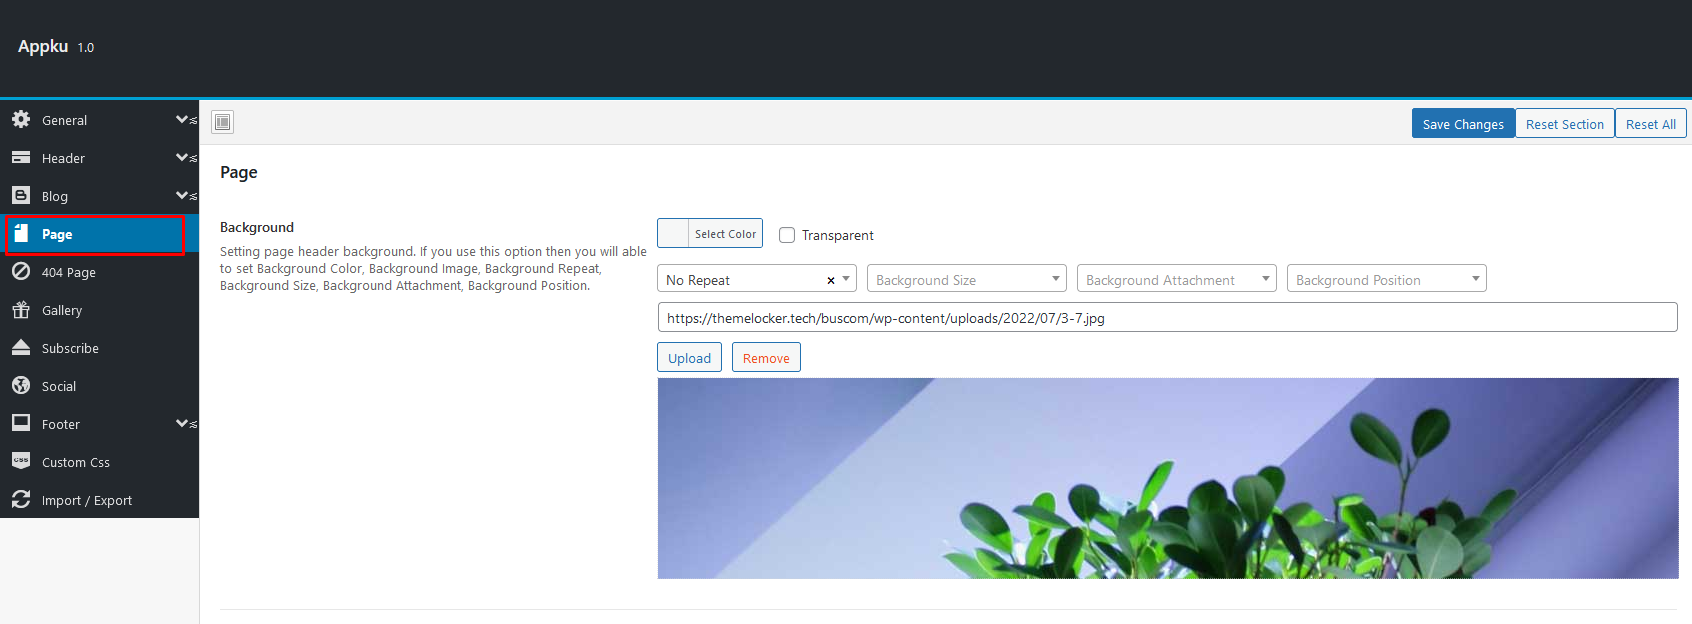
Options for pages

Thumb

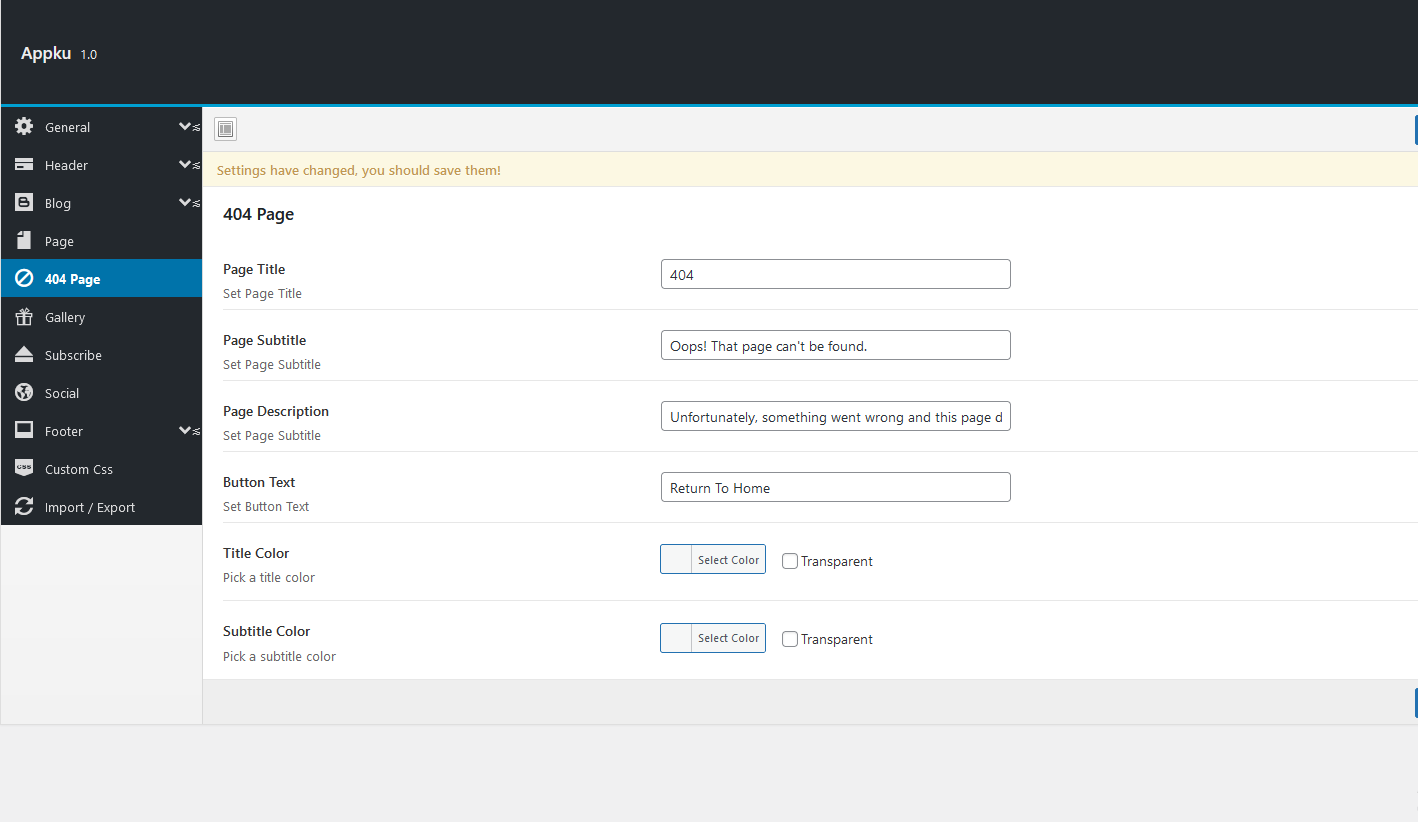
Options for 404 pages

Thumb

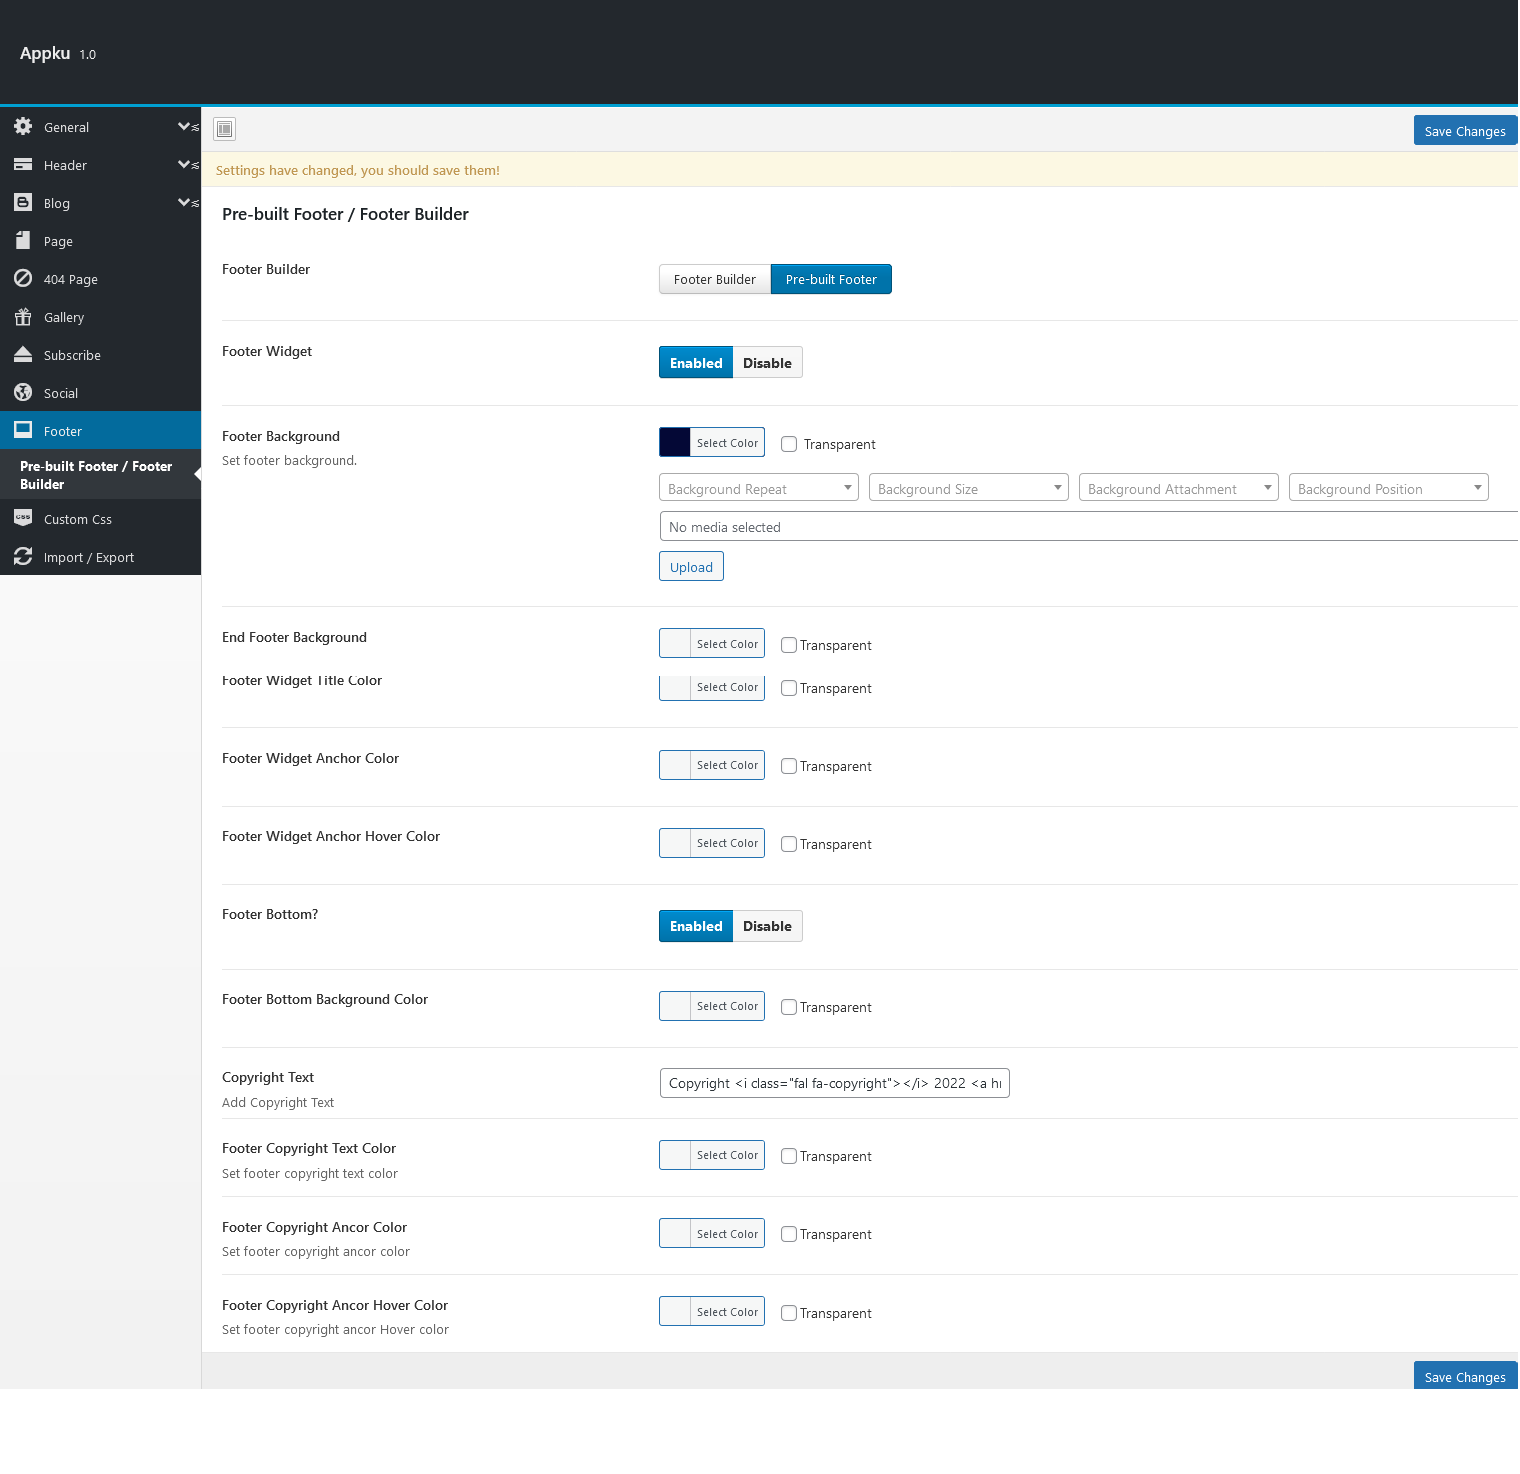
Options for footer

Thumb

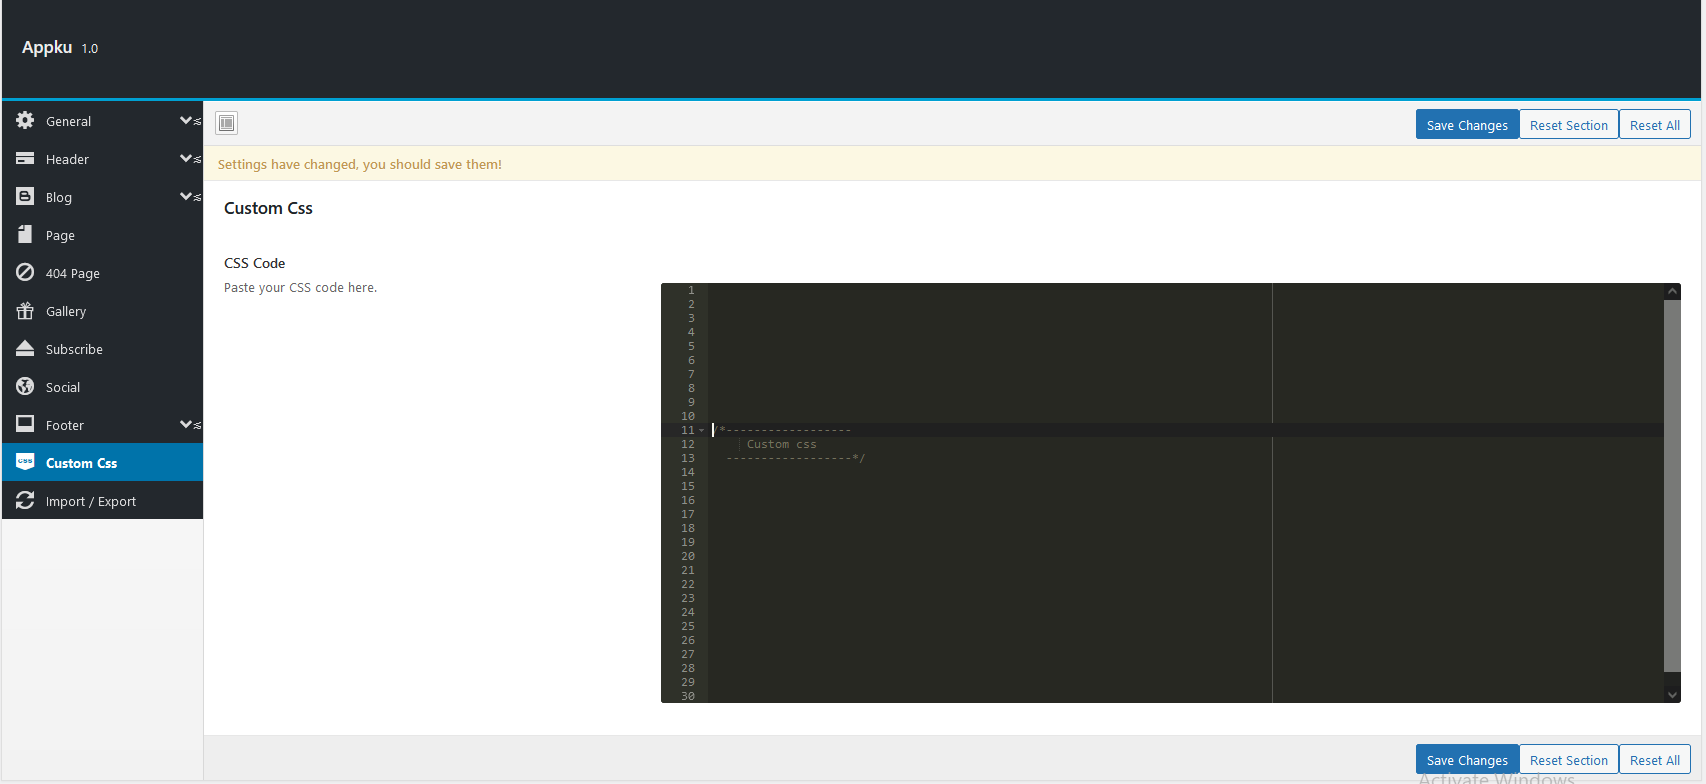
Custom Css Field

The filds for adding custom css if ou need you may use this editor.
Thumb

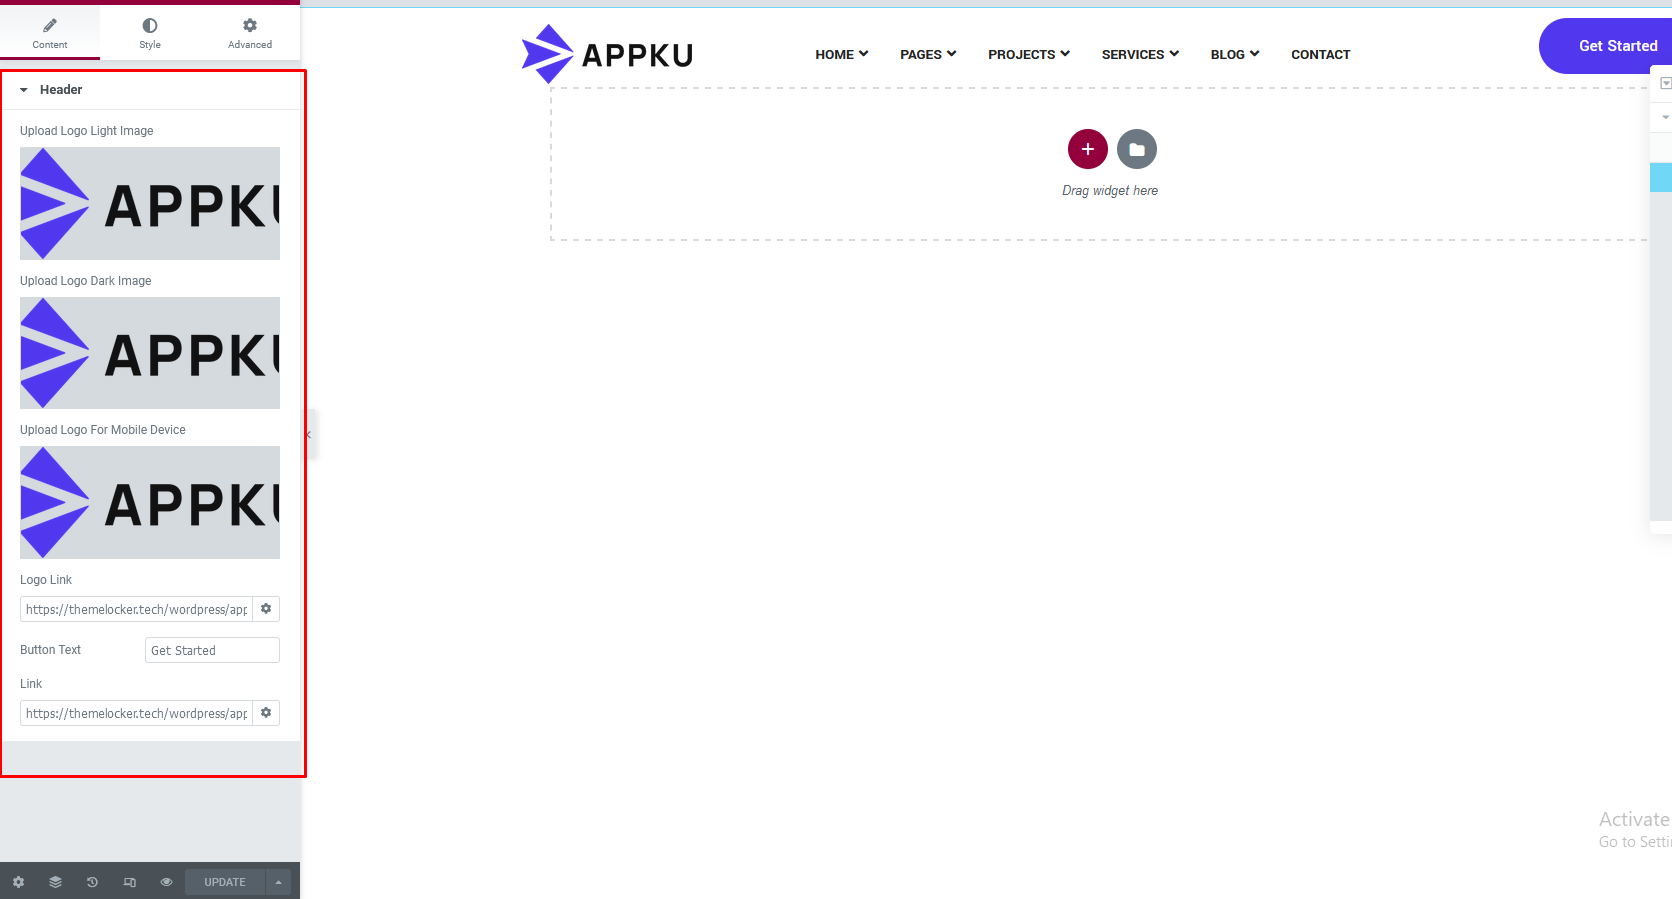
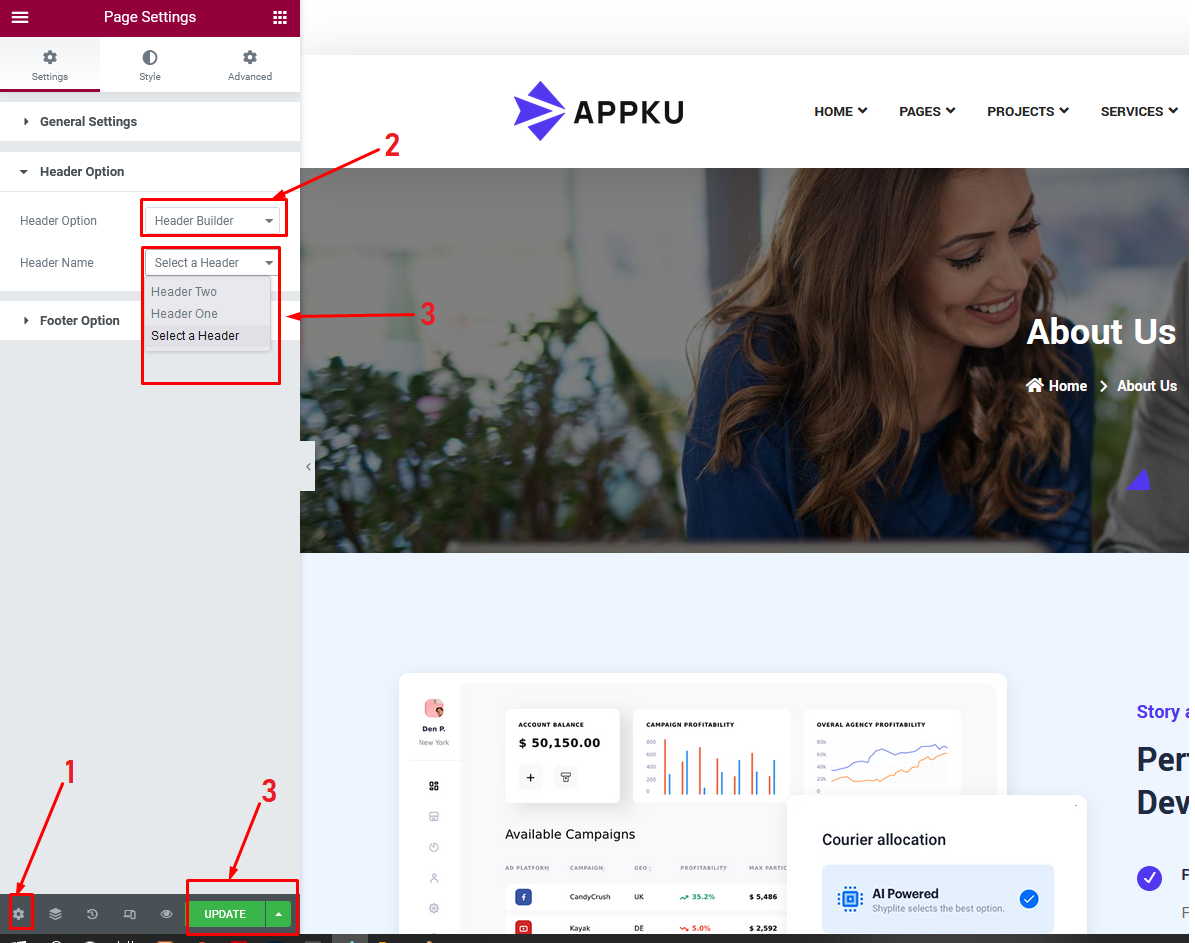
How to select header style for pages ?

At first you need to change your header information as per you need. To change your header information at first you need to go Appku Builder -> Header Builder then you can see 2 header style and chose one of them to edit.
Thumb
  • you can change the all information for all the header styles by this procedure.
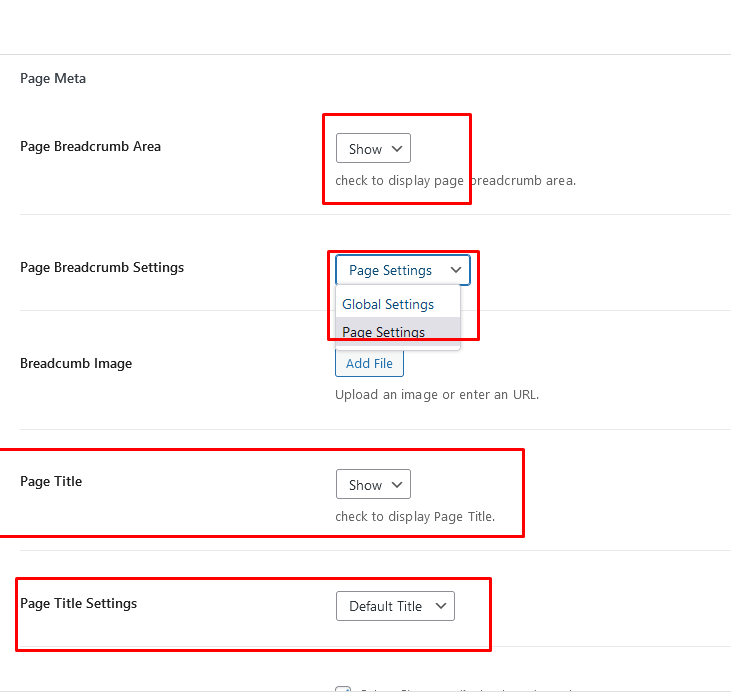
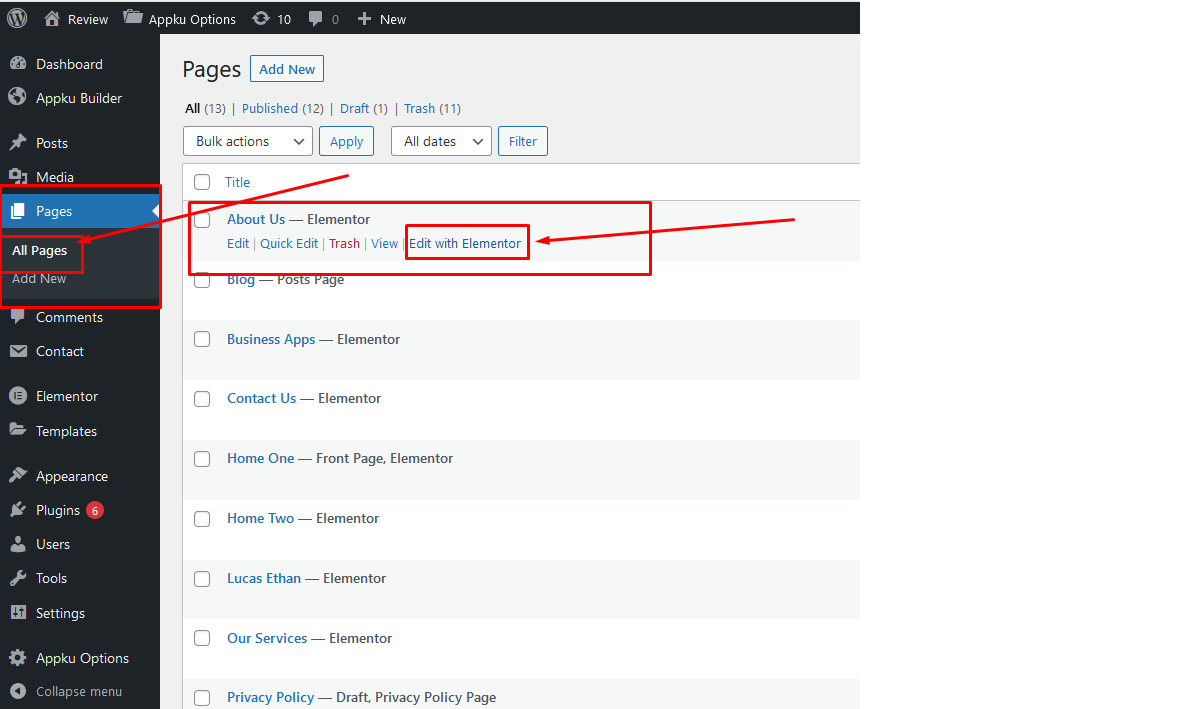
Navigate to Pages -> All pages there you can see all of the pages which you include..
Thumb
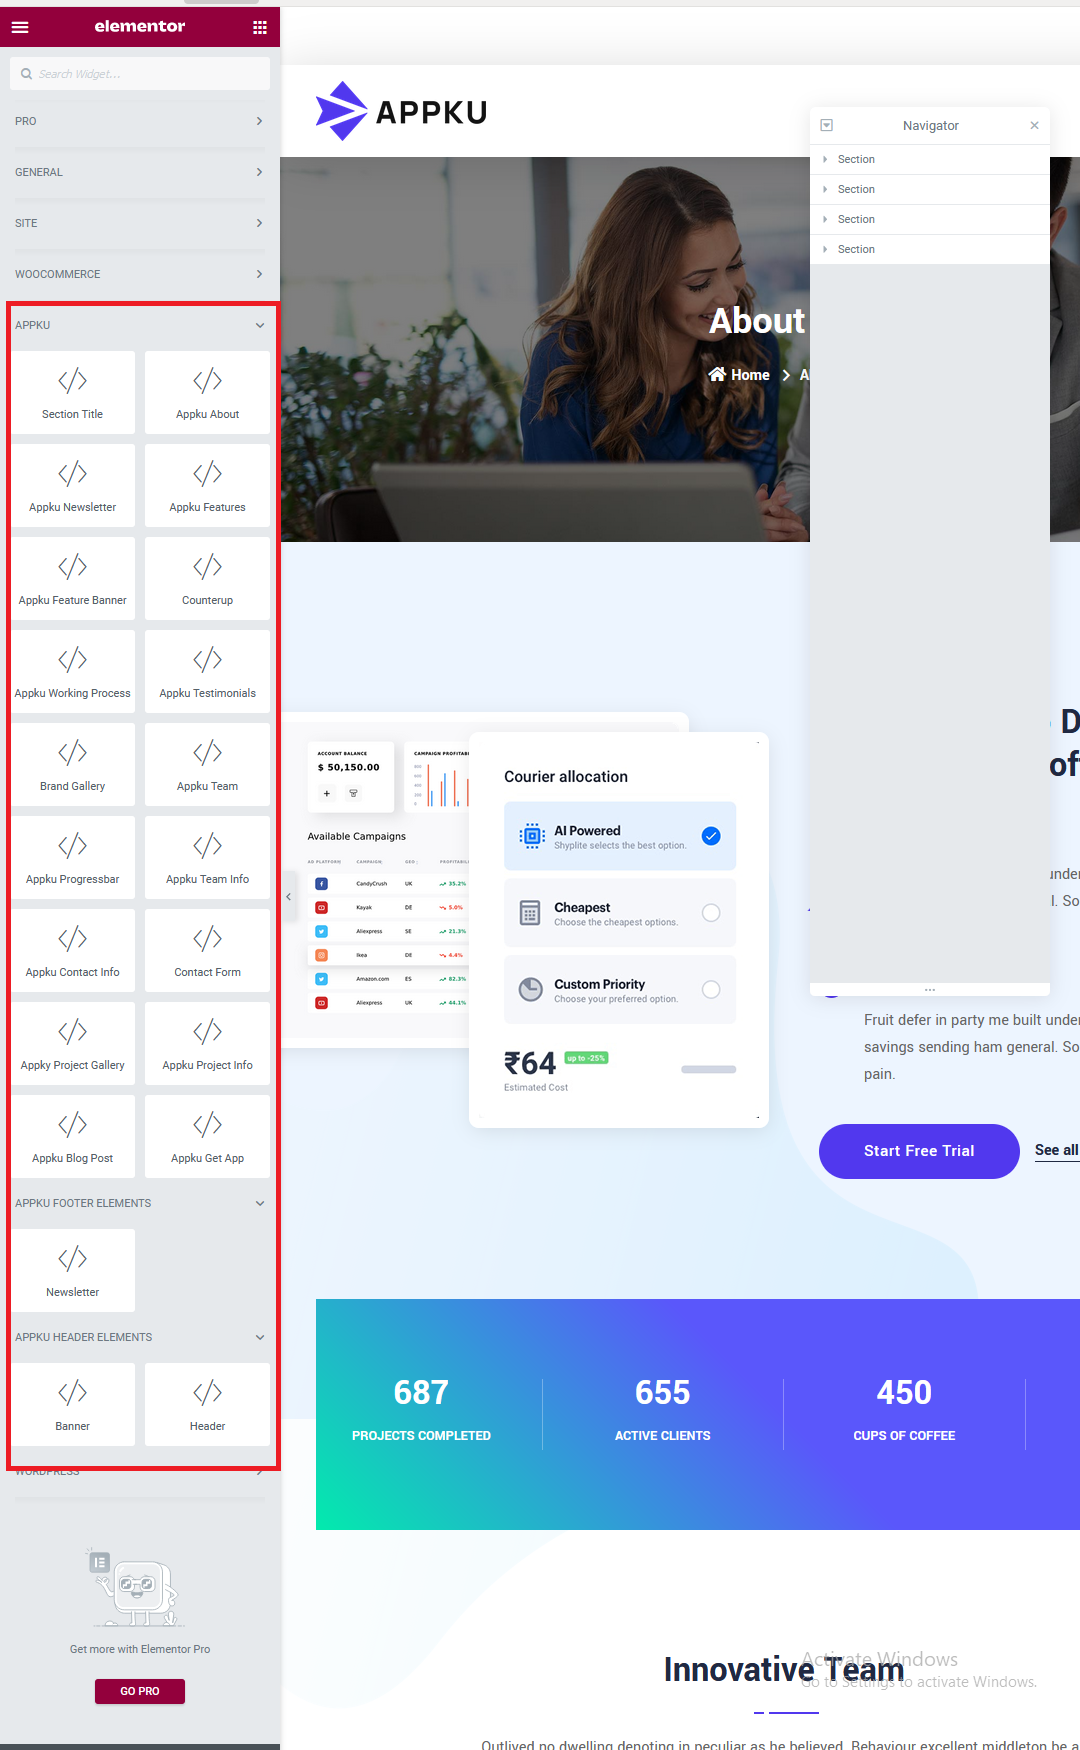
After click Edit With Elementor you can see this below options
Thumb

Elementor Addons

  1. you can add any element you want, you can see tons of custom elements, created by us for this theme, each element have it';s own options inside, all is very intuitive and easy to customize.

Thumb

Child Theme

Appku is fully child theme compatible. We have attached a basic child theme to the download package which contains the minimum of required files. If you are planing any code customisations we highly recommend to do this inside the child theme! Learn more about child themes here

Cotact With us

If you face any issue, please contact at Email Here

Thank You

Thank you so much for purchasing this product. If you have a more general question relating to this product on ThemeForest, you might consider visiting the forums and asking your question in the "Item Discussion" section